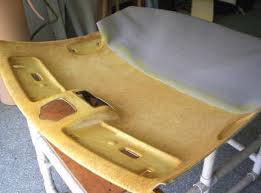
For this you will need glue (it is best not to use a contact adhesive, but opt for something which allows you to slightly adjust the position of the material before it sets), a Stanley or art knife, a selection of screwdrivers. Also of great help are scissors and (especially) clips to hold the headlining on the window aperture lips whilst the glue sets.
Begin by fitting the rods through the loops in the headlining top, then fit the centre rod into position inside the car, and adjust its position until the
headlining reaches both the front and rear screens. Check that the lining is not skewed, then fit the other rod ends and check the positioning again. Bear in mind that you're more likely to run out of material at the rear end, so check that there is enough here to reach down the C posts before you begin fixing it permanently.
Fit the material back into the clips at the top of the door aperture, pulling and smoothing it out as you go. If you are fitting a new headlining then it will probably prove necessary to trim these and other edges.Spread glue around the front windscreen aperture lip, and attach the headlining to this, using clips to hold it whilst the glue sets and smoothing it out as you go. At the top of the front windscreen pillar and B post, the material folds under to give a neat edge. Glue the headlining to the rear then the side window aperture lips, then stretch it down the C post and glue this.
The B post covering is separate from the headlining and, if you are fitting a new set, you will probably have to trim the material. Open up one of the lower B post retaining clips enough to be able to feed in the edge moulding, and slide this into place. Glue the material to the B post and side window aperture lip. The last two pieces of the headlining kit go underneath the side windows. Glue them to the aperture then stretch and smooth them down and glue the lower edges.
Fit the rear view mirror, sun visors, grab straps and other furniture. You can usually feel their fixing holes through the material. Finally, gentle heat from a hairdryer can be used whilst you smooth out the (hopefully few) wrinkles in the headlining.


