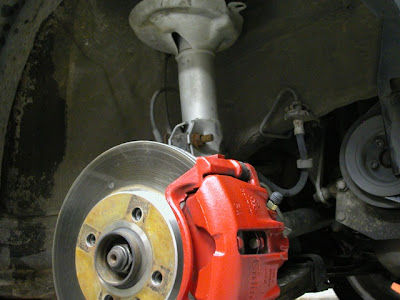
Check the fluid level in the brake master cylinder; if this is a little low then top up with new brake fluid. If the level is very low then fluid has been lost and the car should not be used until the cause has been identified and dealt with. (See Chapter Four.)Check the thickness of the lining of the pads/shoes. The minimum acceptable thickness is 1/8 in. (3 mm) for pads, and 3/10 in. (2.5 mm) for shoes.are approaching this thickness then it is as well to renew them. There are inspection holes in the brake backplate for checking the shoe thickness,if the brake pedal travel is too great and the handbrake is inefficient, the rear drum brakes will have to be adjusted. Note that later cars have self-adjusting rear drum brakes, and poor braking performance usually means that either the pads and shoes are contaminated or worn, or that some part of the mechanism is sticking.Drum brake shoes are supported at one end by the wheel cylinder pistons; these are pushed outwards so that the shoe presses against the drum when the brake pedal is pressed. At the other end the shoes are located in the adjusting screws. Adjustment is carried out by removing the two blanking plugs in each backplate, and using a straight-bladed screwdriver (an old screwdriver with a cranked end is better) to turn the star adjuster wheel for each shoe in turn. Adjust each shoe until the wheel is locked, then back it off until the wheel will turn freely.Operate both the handbrake and foot brake to centralise the shoes, then re-adjust the brakes if necessary; sometimes this process will have to be repeated several times before the shoes are correctly adjusted.Check the handbrake travel and adjust if necessary. When the handbrake is pulled up onto the fourth notch, the rear wheels should be locked. If not, then adjust as follows. If you have just adjusted the brakes, then pump the pedal to centralise the shoes. Pull the handbrake onto the second notch then remove the rubber gaiter from the bottom of the handbrake lever. Slacken off the locknuts on the cable ends, then insert a screwdriver into each cable end slot in turn to prevent it from turning whilst you tighten the nut. Adjust the cable end nuts so that equal pressure is felt on both. then test the handbrake by pulling it up to notch four and seeing whether the wheels are locked. Repeat if necessary and finish by tightening the locknuts and re-fitting the gaiter.If, in common with the author, you have difficulty in remembering which way to turn the adjusters in order to spread the shoes, try holding a nut and bolt by the adjuster so that the bolt head takes the place of the shoe end and the nut imitates the adjuster. By turning the nut you will see (there are no left-hand threads) whichway the bolt head moves and deduct whether to turn the adjuster up or down. The front adjusters are the more difficult to get at. and a cranked screwdriver will be a positive aid.


